
Microsoft has been progressively moving away from basic SMTP authentication in Exchange Online. This change is part of a broader effort to improve security across Microsoft 365 services. Basic authentication relies on simple username and password combinations, which are vulnerable to attacks. Threats such as password spraying and brute-force attempts often exploit SMTP AUTH when it is enabled. By disabling it, Microsoft reduces the attack surface for organizations. Modern authentication methods like OAuth 2.0 provide stronger protection and support multi-factor authentication. Microsoft announced these changes well in advance to give organizations time to adapt. Despite the general deprecation, SMTP AUTH has not been fully removed in all scenarios.
It can still be enabled selectively for specific mailboxes when required. This is useful for legacy applications and devices that cannot support modern authentication. However, Microsoft strongly recommends replacing those systems with newer alternatives.
Options include using authenticated APIs such as Microsoft Graph or secure mail relay services. Administrators now have more granular control over enabling or disabling SMTP AUTH per user. This allows them to maintain functionality while limiting unnecessary exposure. Organizations that fail to adapt may experience disruptions in email sending capabilities.
Devices like printers and scanners are often affected by this transition. Microsoft provides guidance and tools to help identify systems still using basic authentication. Logging and reporting features in Azure AD can highlight risky sign-in behavior.
The overall goal is to align with modern security standards and zero trust principles. Disabling SMTP AUTH is therefore a critical step toward a more secure cloud environment.
Problem
- (Legacy) Applications that don’t support modern authentication
- Multifunctionals?
Solution
- SMTP AUTH with OAuth 2.0 (Microsoft is gradually deprecating basic auth SMTP, but SMTP AUTH with OAuth still works.)
- Create a wrapper around legacy application
- SMTP Relay
The easiest solution without touching the current infrastructure, is using an SMTP Relay.
If we want to use an SMTP Relay, we still got multiple options:
- SAAS SMTP Relay
- Docker container as SMTP Relay
I have chosen to use Azure Communication Services, as this is by my opinion one of the least maintenance solutions to solve the problem.
What is Azure Communication Services?
A cloud platform from Microsoft Azure that allows developers to add communication features such as voice, video, chat, SMS, and email into their applications using simple APIs and SDKs. It is built on the same global infrastructure that powers Microsoft Teams, which means it can deliver reliable, scalable, and real-time communication experiences across different devices and regions. Applications can support voice and video calling for one-to-one or group scenarios, enabling use cases like customer support or virtual meetings, while chat functionality allows users to send and receive messages in real time or through persistent conversations. It also offers SMS capabilities for sending notifications, alerts, or verification codes worldwide, as well as email services for transactional or bulk messaging. Overall, Azure Communication Services enables organizations to embed rich communication experiences into their software without having to build and maintain their own communication infrastructure.
Oesdeenekdanaweeal (How-to)
You need 2 things to be able to send email:
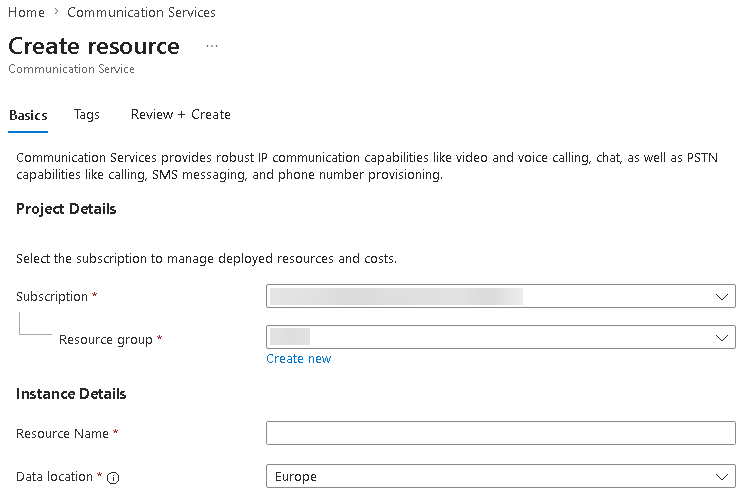
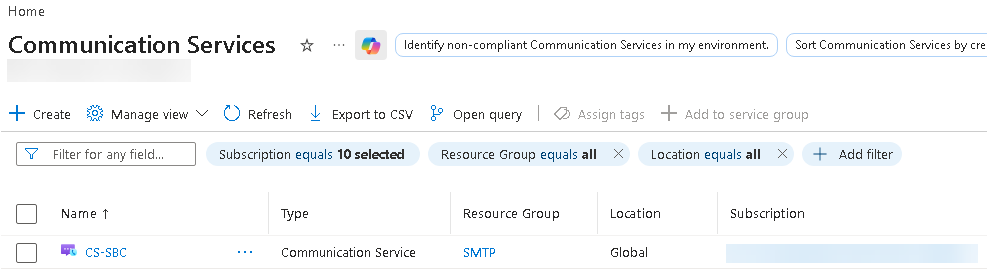
- Create the “Communication Service” Resource
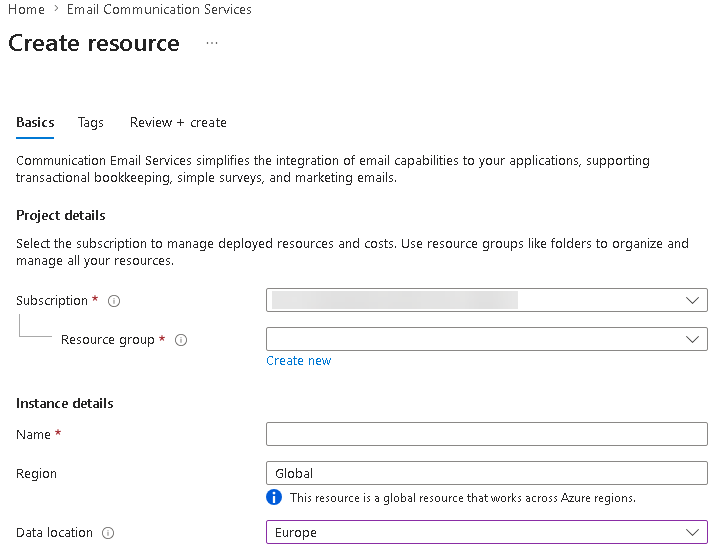
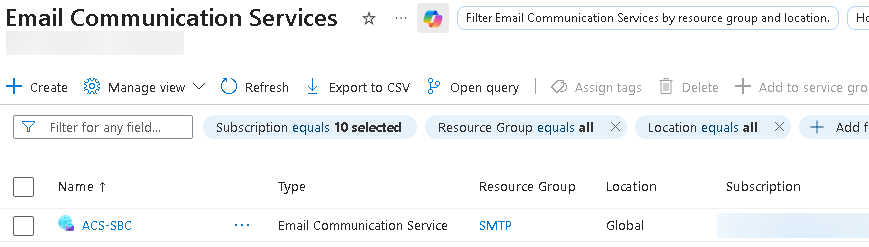
- Create the “Email Communication Services” Resource
- Create App registration with Client Secret
- Create a new Custom Role on the Resource Group where the Communication Service and Email Communication Service are deployed.
- Additional permissions on “Communication Service” object for created App Registration (Custom Role)
- Connect domains in “Communication Service” resource
- Customize sender email address (from:)
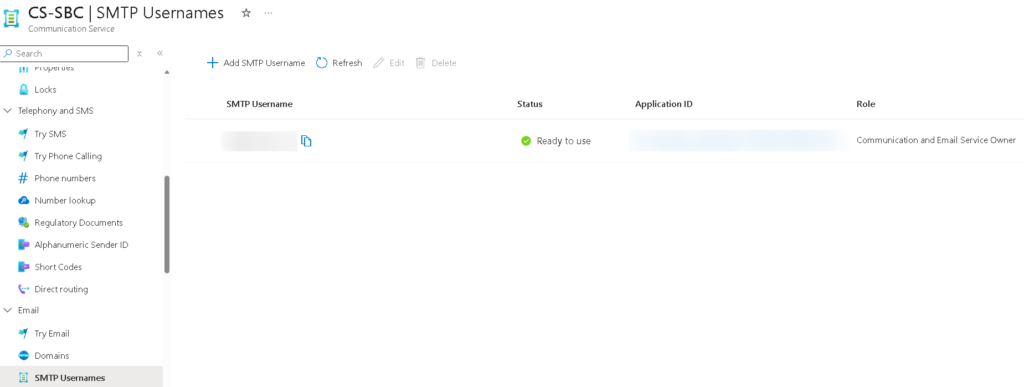
- Generate your SMTP Credentials
- Test with API
1. Create the “Communication Service” Resource
2. Create the “Email Communication Services” Resource
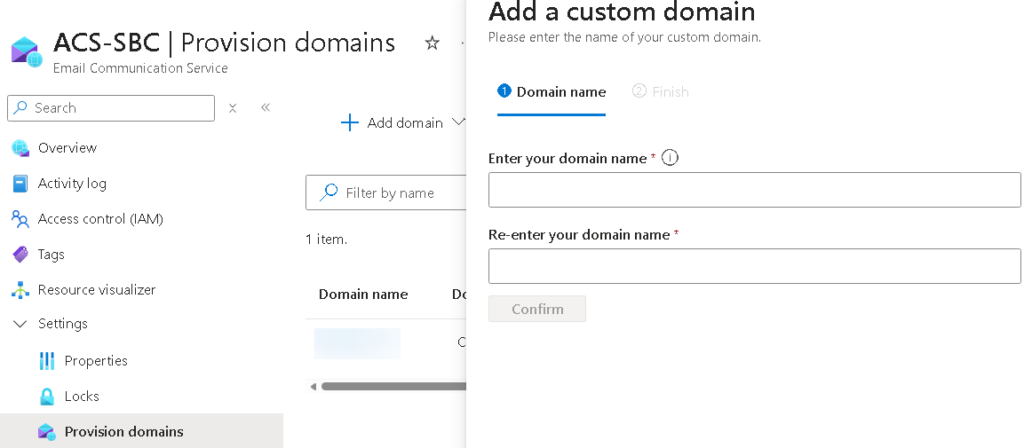
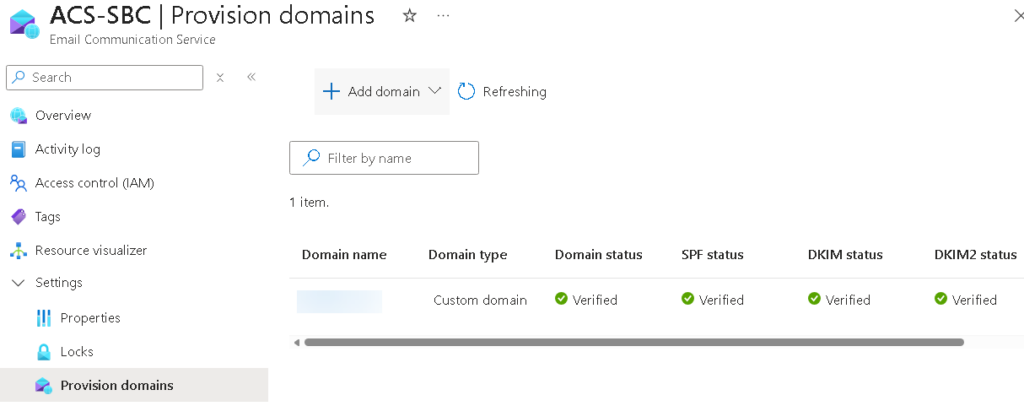
Add the custom domain to “Provision Domains” in the Email Communication Service
Make sure that your domain is verified.
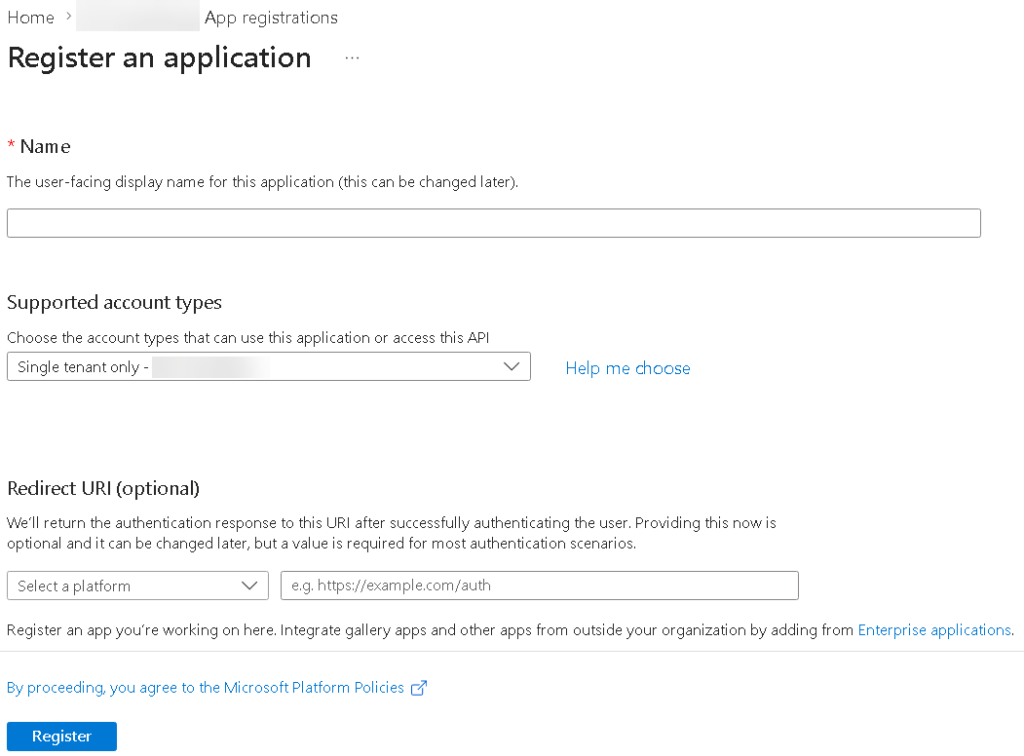
3. Create App registration with Client Secret
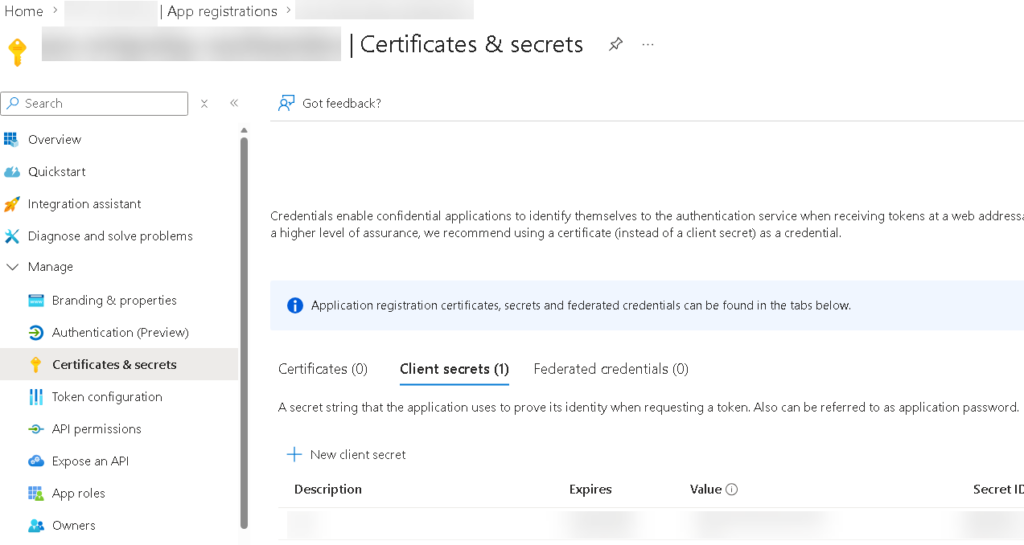
Don’t forget to write down the value as you will need it later!
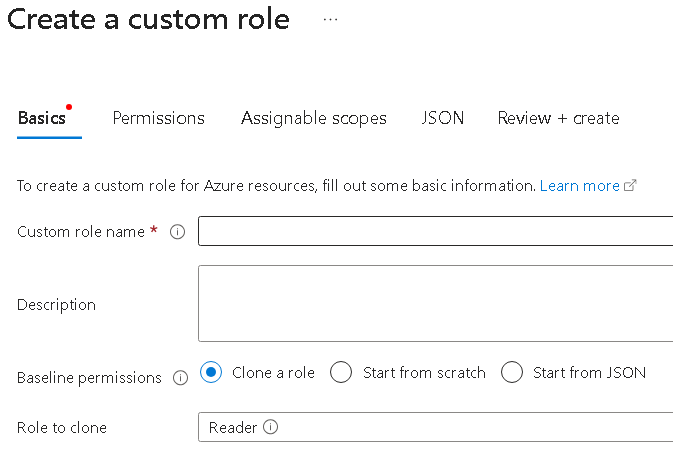
4. Create a new Custom Role on the Resource Group where the Communication Service and Email Communication Service are deployed.
The easiest way is to clone the “Reader” role and add some permissions.
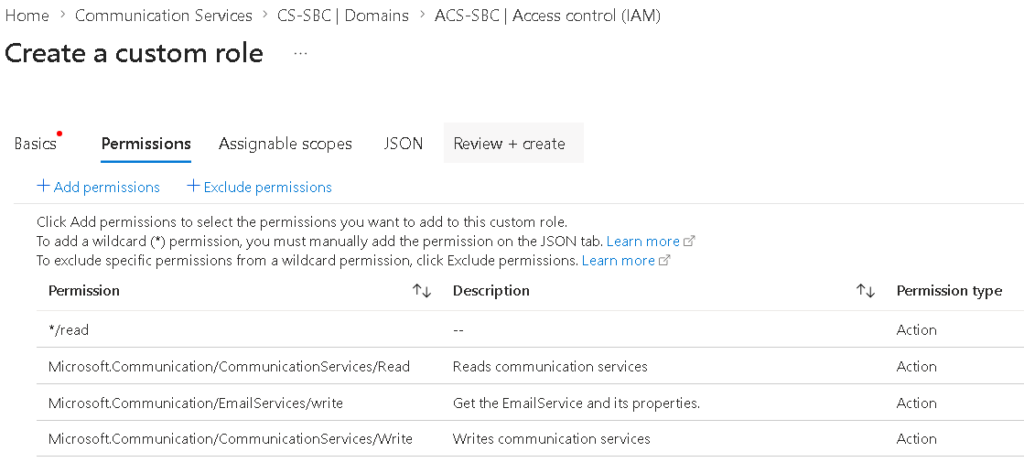
Microsoft.Communication/CommunicationServices/Read
Microsoft.Communication/EmailServices/Write
Microsoft.Communication/CommunicationServices/Write
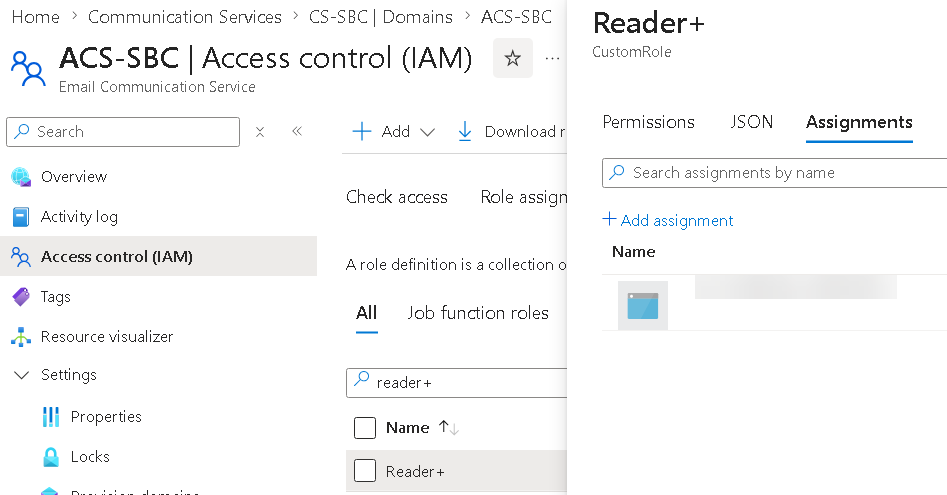
5. Additional permissions on “Communication Service” object for created App Registration (Custom Role)
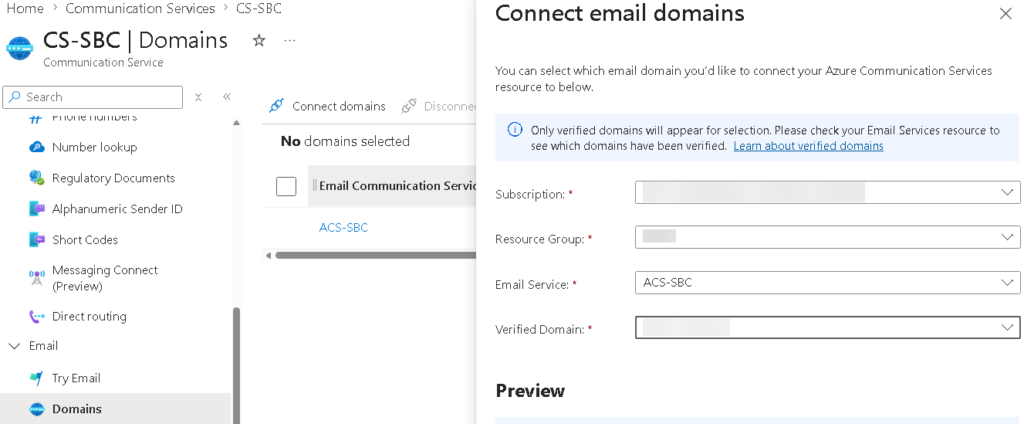
6. Connect domains in “Communication Service” resource
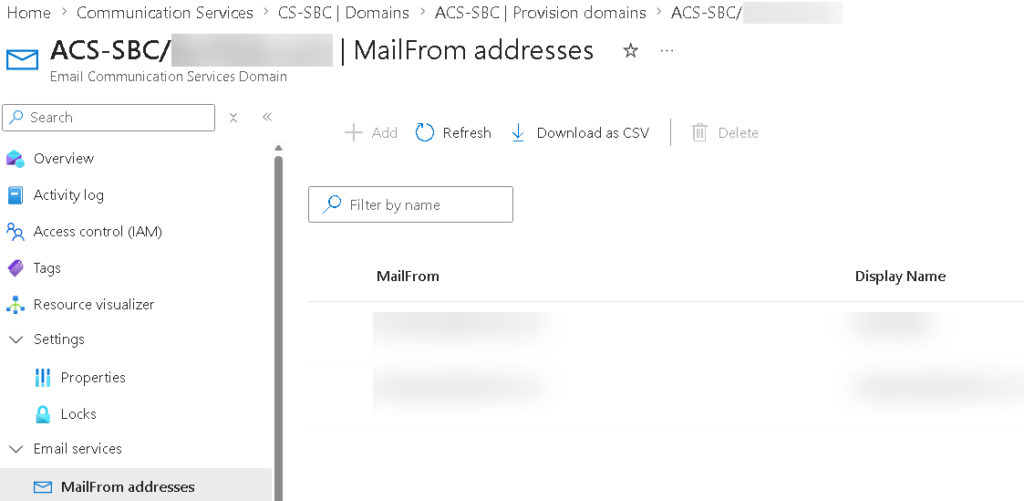
7. Customize sender email address (from:)
Connect-AzAccount
New-AzEmailServiceSenderUsername-ResourceGroupName "XXXX"
-EmailServiceName “ACS-SBC”-DomainName "XXXX.XXXX"
-SenderUsername “XXXX”-Username "XXXX"
-DisplayName “Choose your displayname”
8. Generate your SMTP Credentials
9. Test with API
# Variables
$tenantId = “your-tenant-id”
$clientId = “your-client-id”
$clientSecret = “your-client-secret”
$acsEndpoint = “https://your-resource.communication.azure.com”
$tokenUrl = “https://login.microsoftonline.com/$tenantId/oauth2/v2.0/token”
# Get access token
$body = @{
client_id = $clientId
scope = “https://communication.azure.com/.default”
client_secret = $clientSecret
grant_type = “client_credentials”
}
$response = Invoke-RestMethod -Method Post -Uri $tokenUrl -Body $body
$accessToken = $response.access_token
# Prepare email payload
$emailBody = @{
senderAddress = “donotreply@yourdomain.com”
content = @{
subject = “Test via ACS REST API”
plainText = “This is a test email sent via Azure Communication Services REST API.”
}
recipients = @{
to = @(@{address = “you@example.com”})
}
}
$headers = @{
Authorization = “Bearer $accessToken”
“Content-Type” = “application/json”
}
# Send email
$result = Invoke-RestMethod -Method Post -Uri “$acsEndpoint/emails:send?api-version=2023-03-31” -Headers $headers -Body ($emailBody | ConvertTo-Json -Depth 10)
Write-Host “Email sent! Message ID: $($result.messageId)”